Dawn theme posts
Collections list
Changing the design of the filter
18 May, 2022
Ecommerce product filter is a critical tool to help your visitors discover the products that meet their needs and to provide a great experience aligned with your website design and brand's Look and Feel.
In this example I will show how to make changes to the design of text elements and borders in the filter elements. Additionally, I will show how to add new icons in the filter.
The Challenge
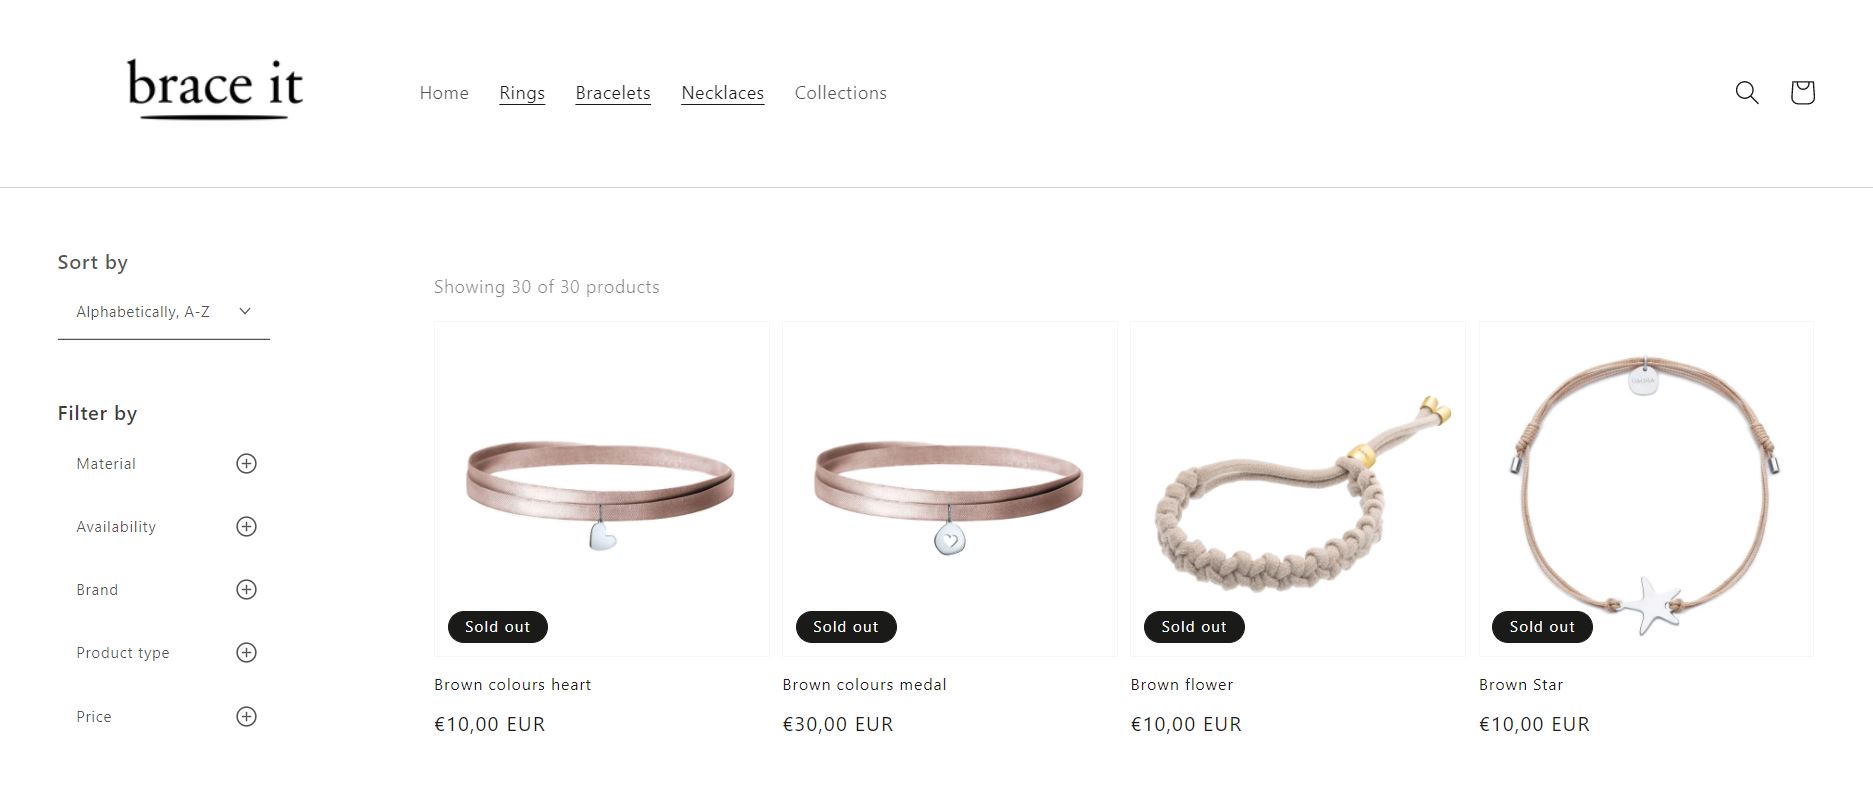
To make these changes we will have to make changes to the text format and size, to the border color and thickness and icons.
Let's break down this job:
- Removing the borders and adding a shadow
- Changing the font size and format
- Inserting a new icon
- Invert the position of the sort by menu
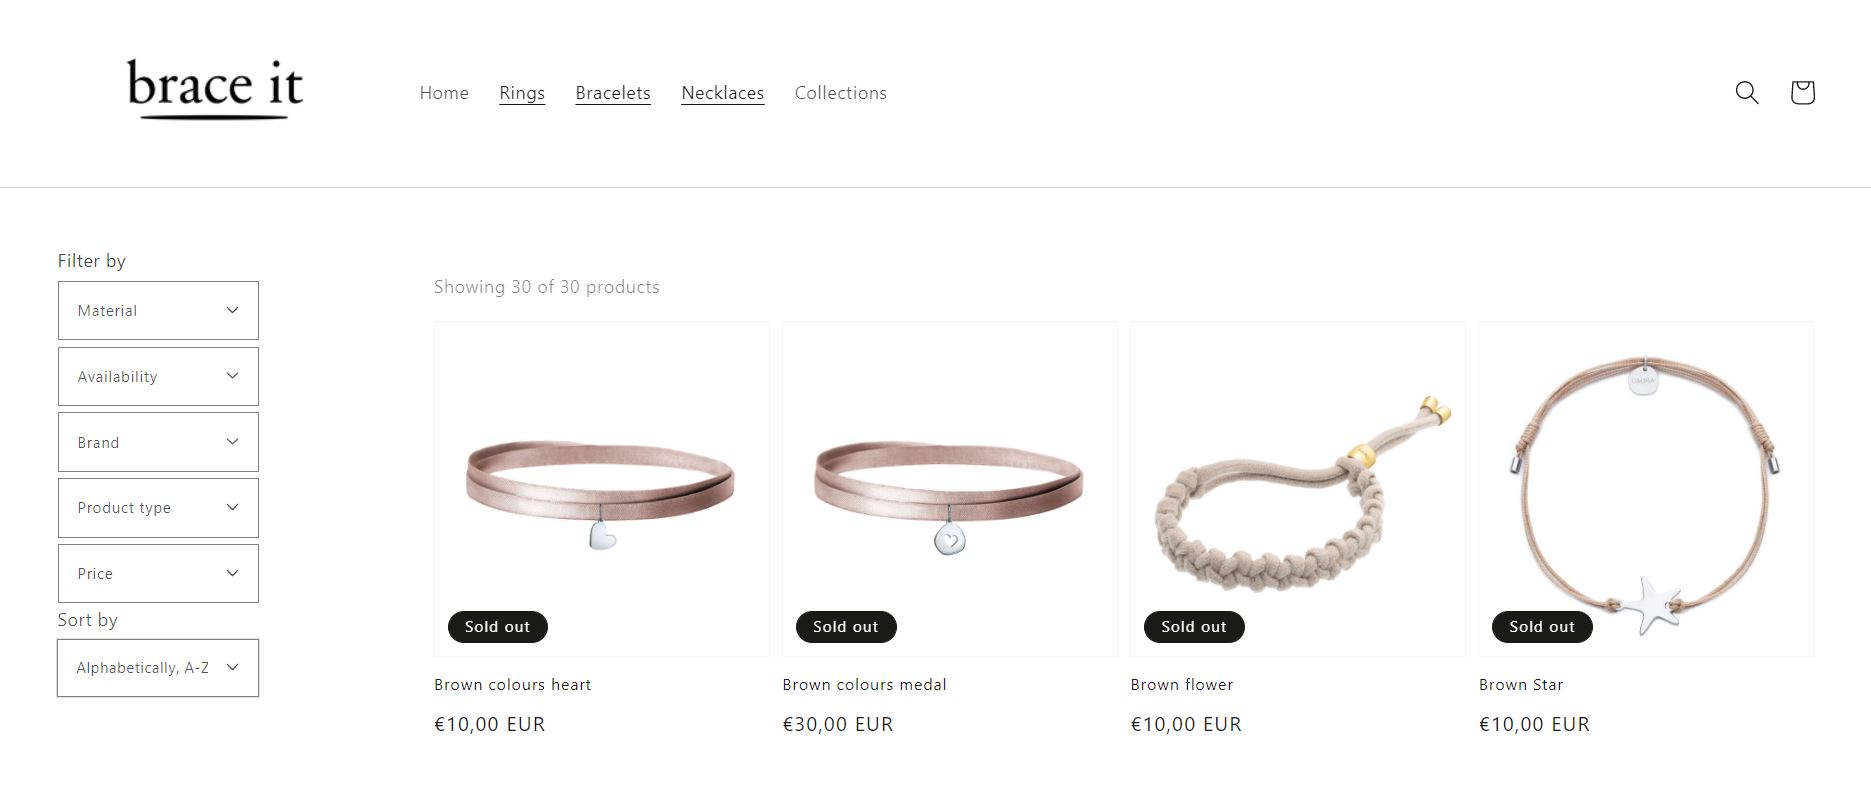
Original design

Existing CSS code
We are going to work in the following selectores in the file: assets>template-collection.css
/* 174 */
.facets__disclosure {
  border: 1px solid rgba(var(--color-foreground), 0.55);
  margin: 0 0 0.5rem 0.5rem;
  transition: box-shadow var(--duration-short) ease;
}

/* 180 */
.facets__disclosure:hover {
  box-shadow: 0 0 0 0.1rem rgba(var(--color-foreground), 0.55);
}

/* 161 */
. facets__heading {
  display: block;
  color: rgba(var(--color-foreground), 0.85);
  font-size: 1.4rem;
  line-height: 1;
  margin: 0 0 1rem 0.5rem;
  width: 100%;
}
/* 170 */
.facets__reset {
  margin-left: auto;
}

/* 235*/
.facet-checkbox {
padding: 1rem 2rem 1rem 1.2rem;
flex-grow: 1;
position: relative;
font-size: 1.4rem;
display: flex;
word-break: break-word;
}


/* 198*/
facets__display {
background-color: rgb(var(--color-background));
position: absolute;
border: 1px solid rgba(var(--color-foreground), 0.2);
top: calc(100% + 0.5rem);
left: -0.1rem;
width: 35rem;
max-height: 55rem;
overflow-y: auto;
}

/* 153*/
.facets__wrapper {
grid-column: 1;
grid-row: 1;
display: flex;
flex-wrap: wrap;
margin-left: -0.5rem;
}
And also in these selectores in the file: assets>base.css
/* 1334*/

.field__input:focus,
.field__input:not(:placeholder-shown),
.field__input:-webkit-autofill,
.customer .field input:focus,
.customer .field input:not(:placeholder-shown),
.customer .field input:-webkit-autofill {
    padding: 2.2rem 0.5rem 0.8rem;
}

/* 1248*/

.field__input:hover,
.select__select:hover,
.customer .field input:hover,
.customer select:hover,
.localization-form__select:hover {
  box-shadow: 0 0 0 0.2rem rgba(var(--color-foreground), 0.55);
}

/* 1256*/

.field__input:focus-visible,
.select__select:focus-visible,
.field input:focus-visible {
  box-shadow: 0 0 0 0.1rem rgba(var(--color-foreground), 0.55),
    0 0 0 0.3rem rgb(var(--color-background)),
    0 0 0.5rem 0.4rem rgba(var(--color-foreground), 0.3);
}

/* 1264*/

.field__input:focus,
.select__select:focus,
.field input:focus {
  box-shadow: 0 0 0 0.1rem rgba(var(--color-foreground), 0.55),
    0 0 0 0.3rem rgb(var(--color-background)),
    0 0 0.5rem 0.4rem rgba(var(--color-foreground), 0.3);
}
The Solution

Add the following code in the end of the file to change the border and fonts of filter and sort by menus: assets>template-collection.css
/* removing border from filter options*/
.facets__disclosure,
.facets__header {
  border: none;
}

/* removing shadow on hover */
.facets__disclosure:hover{
  box-shadow: none;
}

/* change font size in the filter headings */
/* Changing the font format - weight */
.facets__heading{
  font-size: 1.6rem;
  font-weight: 600;
}

/* change filter options font size */
.facet-checkbox{
  font-size: 1rem;
}

/* change filter sort menu font */
.collection-filters__label{
  font-size: 1.6rem;
}

/* removing border of price and organizing price display*/
.facets__display{
  border: none;
}

.facets__price{
  padding: 2rem 0rem;
}

.facets__price>*+* {
    margin-left: 1rem;
}

/* changing the box to add some shadow */
.facets__display{
  border: 1px solid;
  padding: 10px;
  /* box-shadow: 5px 10px #888888; */
  box-shadow: -1px 2px 12px 6px #888;
}

.count-bubble{
  float: right;
}
Next to change the price fonts and box designs go to the file: assets>base.css
/* this is to change the filter price field */
.field__input:focus,
.field__input:not(:placeholder-shown),
.field__input:-webkit-autofill,
.customer .field input:focus,
.customer .field input:not(:placeholder-shown),
.customer .field input:-webkit-autofill {
    padding: 2.2rem 0.5rem 0.8rem;
}

.field__input, .select__select, .customer .field input, .customer select {
  box-shadow: none;
  border-bottom: solid 0.1rem;
  transition: none;
}

.field__input:hover,
.select__select:hover,
.customer .field input:hover,
.customer select:hover,
.localization-form__select:hover {
  box-shadow: none;
  border-bottom: solid 0.2rem;
}

.field__input:focus-visible,
.select__select:focus-visible,
.field input:focus-visible {
  box-shadow: none;
  border-bottom: solid 0.2rem;
}

.field__input:focus,
.select__select:focus,
.field input:focus {
  box-shadow: none;
  border-bottom: solid 0.2rem;
}
In this example we will use an icons SVG files from the site https://ionic.io/ionicons.
After you choose the icon we can link it to our theme, the simplest and easy way to do it is by embeding the code snippet, most of the sites with icons offer this option.
I will choose the plus sign within a circle icon
To change the icon we will need to remove the existing icon and after we will add a new element icon.
Now make the following changes to the file: sections>main-collection-product-grid.liquid
< ion-icon class="osg-icon" name="add-circle-outline">< /ion-icon>
Now you can see the new icon in the filter, let's make changes in the icon styling
open again the file to make the changes: sections>template-collection.css
/* change filter icon */
.mobile-facets__summary>div, .facets__summary>div {
  justify-content: space-between;
}

.osg-icon{
height: 2rem;
width: 2rem;
}

/* separate icon from text */
.facets__wrapper {
  width: 100%;
}

/* invert position of the sort by with filter */
.facets__heading, .facets__form {
    display: flex;
    flex-direction: column-reverse;
}